Buying travel insurance is the easy part.
Actually having to use it? That’s when things get a little more complicated.
Over the years, I’ve had to make several travel insurance claims for very different reasons. I’ve dealt with trip interruption after my grandma died while I was travelling through China and New York City, a lost phone in Panama, and most recently, almost $2,400 CAD in expenses after injuring my knee in Peru.
Every claim has been different, but they’ve taught me one very important lesson:
Documentation is everything.
Receipts. Credit card statements. Flight confirmations. Hotel bills. Medical paperwork. Cancellation emails. Screenshots.
Basically, if there’s even a slight chance it could prove where you were, what you booked, what you paid or why your plans changed, keep it.
I’ve become that person who keeps everything.
And after getting almost $2,400 CAD back from my Peru trip, I’m perfectly okay with that.
This isn’t about guaranteeing that an insurance company will approve your claim. Every insurer, policy and situation is different. But there are things you can do before your trip, while something is going wrong and before you hit submit that can make the process much easier.
Here’s what filing travel insurance claims has taught me—and what I now do every time I travel.
1. Contact Your Insurance Company ASAP
When something goes wrong, one of the first things I recommend doing is contacting your travel insurance company.
Don’t wait until you get home.
When I injured my knee on the Inca Trail, I didn’t have reliable service along the trail. As soon as I reached Machu Picchu and had a connection again, I emailed World Nomads and told them what had happened.
At that point, I hadn’t even been to the hospital yet. I didn’t know what was wrong with my knee, how much treatment would cost or what I was eventually going to claim.
That turned out to be useful because they told me what paperwork I would need and offered to recommend a hospital in Cusco. Since I had absolutely no idea which hospital to choose, I happily took the recommendation.
It also meant there was already a record of my injury before I started paying medical bills.
The same idea applies to other types of claims. If your trip is interrupted, your luggage disappears, you need medical treatment or something else happens that could potentially become an insurance claim, contact your insurer and find out what they want you to do next.
Every company and policy can have different rules, so ask questions.
Do I need to fill out a form? Do you need a doctor's note? Do I need approval before paying for something? What documents should I collect?
You may still be stressed, injured or standing somewhere thinking, Well, this wasn't part of the itinerary.
But a quick email or phone call at the beginning can save you from trying to recreate everything once you’re home.
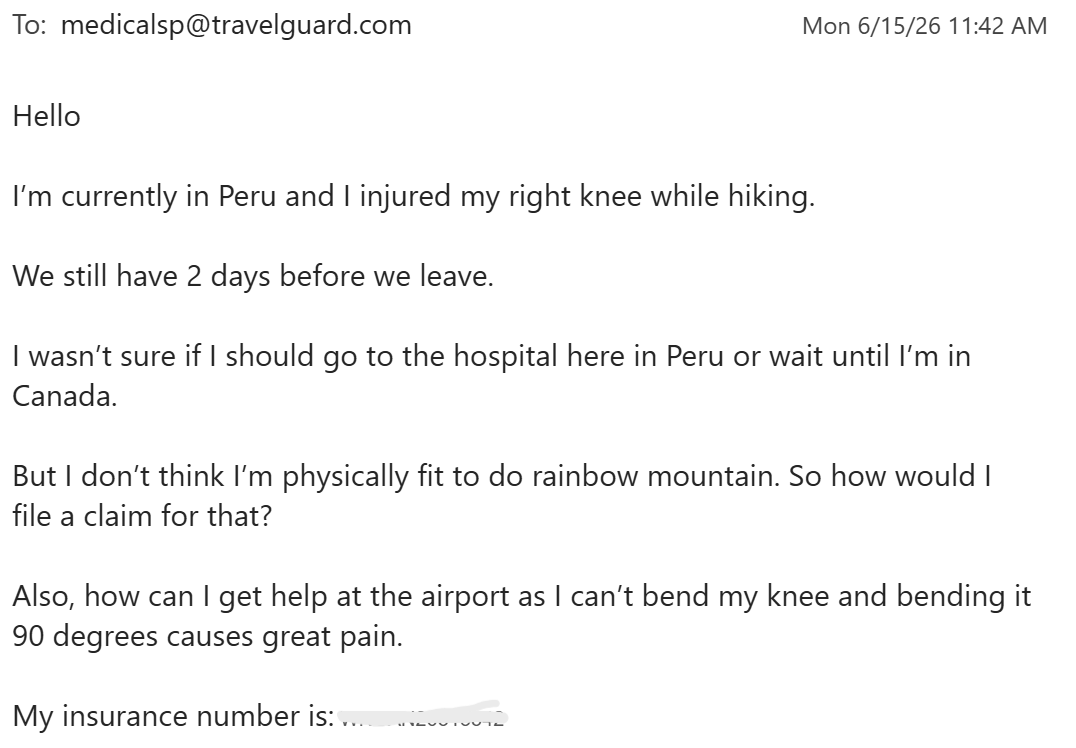
As soon as I had internet again, I contacted my travel insurance company. I didn’t know what was wrong with my knee yet—I just knew I needed help figuring out what to do next.
2. Find Out What You Need — And Get It Before You Leave
Once you’ve contacted your insurance company, find out exactly what they’re going to need for the claim.
Then start collecting it before you leave the destination.
In Peru, World Nomads emailed me the insurance forms, and I had the hospital print them when I arrived. Before flying home, I went through the paperwork with the doctor to make sure everything that needed to be completed was actually there.
I also needed a Fit to Fly form because I was flying home with a knee that wouldn't properly bend.
I made sure the doctor documented that I couldn't bend my knee properly and needed to keep my leg up. That detail mattered because I needed a more spacious seat on the flight home—and I eventually claimed the cost of that upgrade through my travel insurance.
If you need a doctor, airline, hotel, tour company or anyone else to confirm something for your claim, get it in writing while you can.
And actually look at the paperwork.
Don't assume that because someone handed you a completed form, every question has been answered or every box has been checked.
It is much easier to say, “Can you fill this part in too?” while you're standing in front of someone than to discover the missing information after you've flown home.
You might feel slightly ridiculous checking every page before you leave.
Check it anyway.
Your future claim-filing self will thank you.
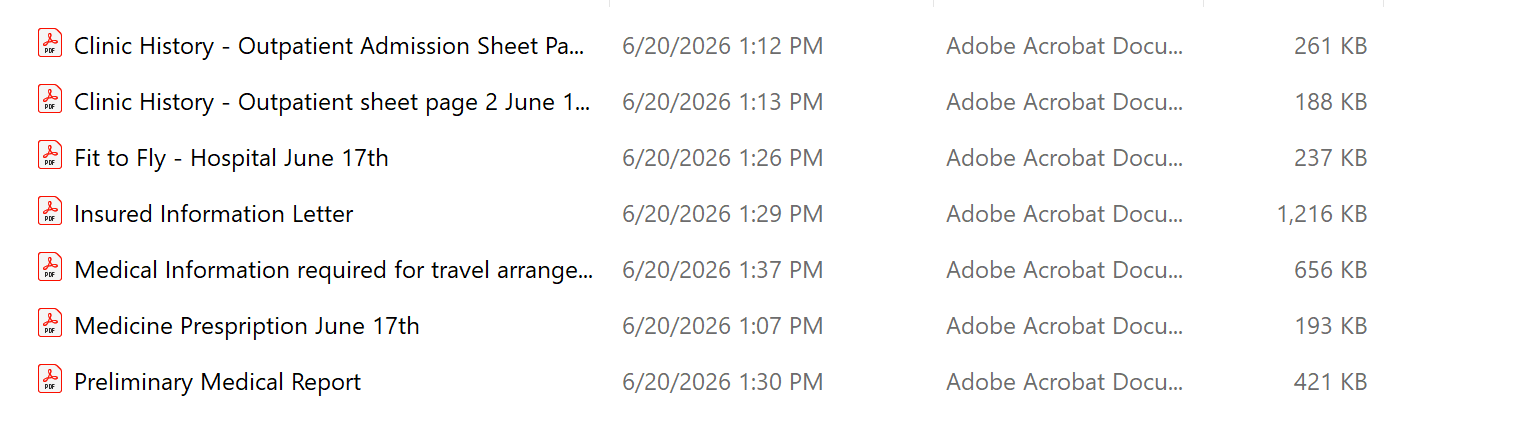
This is why I say to get your paperwork before you leave. Medical reports, my Fit to Fly form, prescription and other hospital documents—all saved and ready for the insurance claim.
3. Keep Proof of Every Travel Purchase
Getting documentation about what happened is one part of the claim.
You may also need to prove what you paid for.
If there is one habit I’ve developed from making travel insurance claims, it’s this:
Keep everything.
And I don’t just mean medical receipts.
Keep your flight and hotel receipts. Tour bookings. Transportation receipts. Airline upgrades. Cancellation emails. Booking confirmations.
I learned just how important this can be when I had to interrupt a trip after my grandma died while I was travelling through China and New York City. For that claim, I needed documentation for things like my flights and hotels.
Those were parts of my original trip, but I still needed to prove what I had booked and paid for.
My Peru claim required a completely different collection of documents: hospital and MRI receipts, transportation expenses, my airline upgrade and the tour I could no longer take.
You don't necessarily know what your insurance company will ask for, so I don't try to predict which receipts will be important.
I keep them all.
I also recommend paying by credit card whenever possible. A receipt can show what something cost, but your insurance company may also ask for proof that you actually paid for it.
Ideally, I want both.
If I book a hotel, I keep the booking confirmation and final receipt, plus the credit card transaction. If I pay a hospital bill, I keep the medical invoice and proof of payment.
I also take photos of paper receipts because those tiny pieces of paper have an incredible ability to disappear when you actually need them.
If something happened during the trip—or there is even a chance you may need to make a claim—don't start deleting anything until everything is completely settled.
If money changed hands during the trip, keep the proof.
Don't decide which receipts are important. Keep everything and let the insurance company decide what they need.

When I say I keep every expense, I mean every expense. Hospital bills, medication, transportation and flight upgrades all got saved as proof for my claim.
4. No Receipt? Don’t Give Up
Of course, sometimes you can do everything right and still not have a nice little receipt sitting in your inbox.
That happened with Rainbow Mountain in Peru.
We had paid for the tour in cash, and when my knee injury meant we could no longer go, I didn’t have an itemized receipt to include with the insurance claim.
Instead of assuming I was out of luck, I contacted the tour company and asked for written confirmation showing how much we had paid, that we were cancelling and what their cancellation policy was.
That became my proof.
I submitted the letter with my claim, and World Nomads accepted it. Mike and Peggy were also able to use the documentation when claiming their missed Rainbow Mountain tour.
The lesson for me was that a missing receipt doesn't necessarily mean you have no way to prove an expense.
Look for another paper trail.
A booking confirmation, email, cancellation letter, invoice or written confirmation from the company may provide the information your insurer needs.
And ask your insurance company what they will accept. Different insurers and claims can have different documentation requirements.
Cash made my Rainbow Mountain claim a little more complicated.
But no receipt didn't mean no claim.
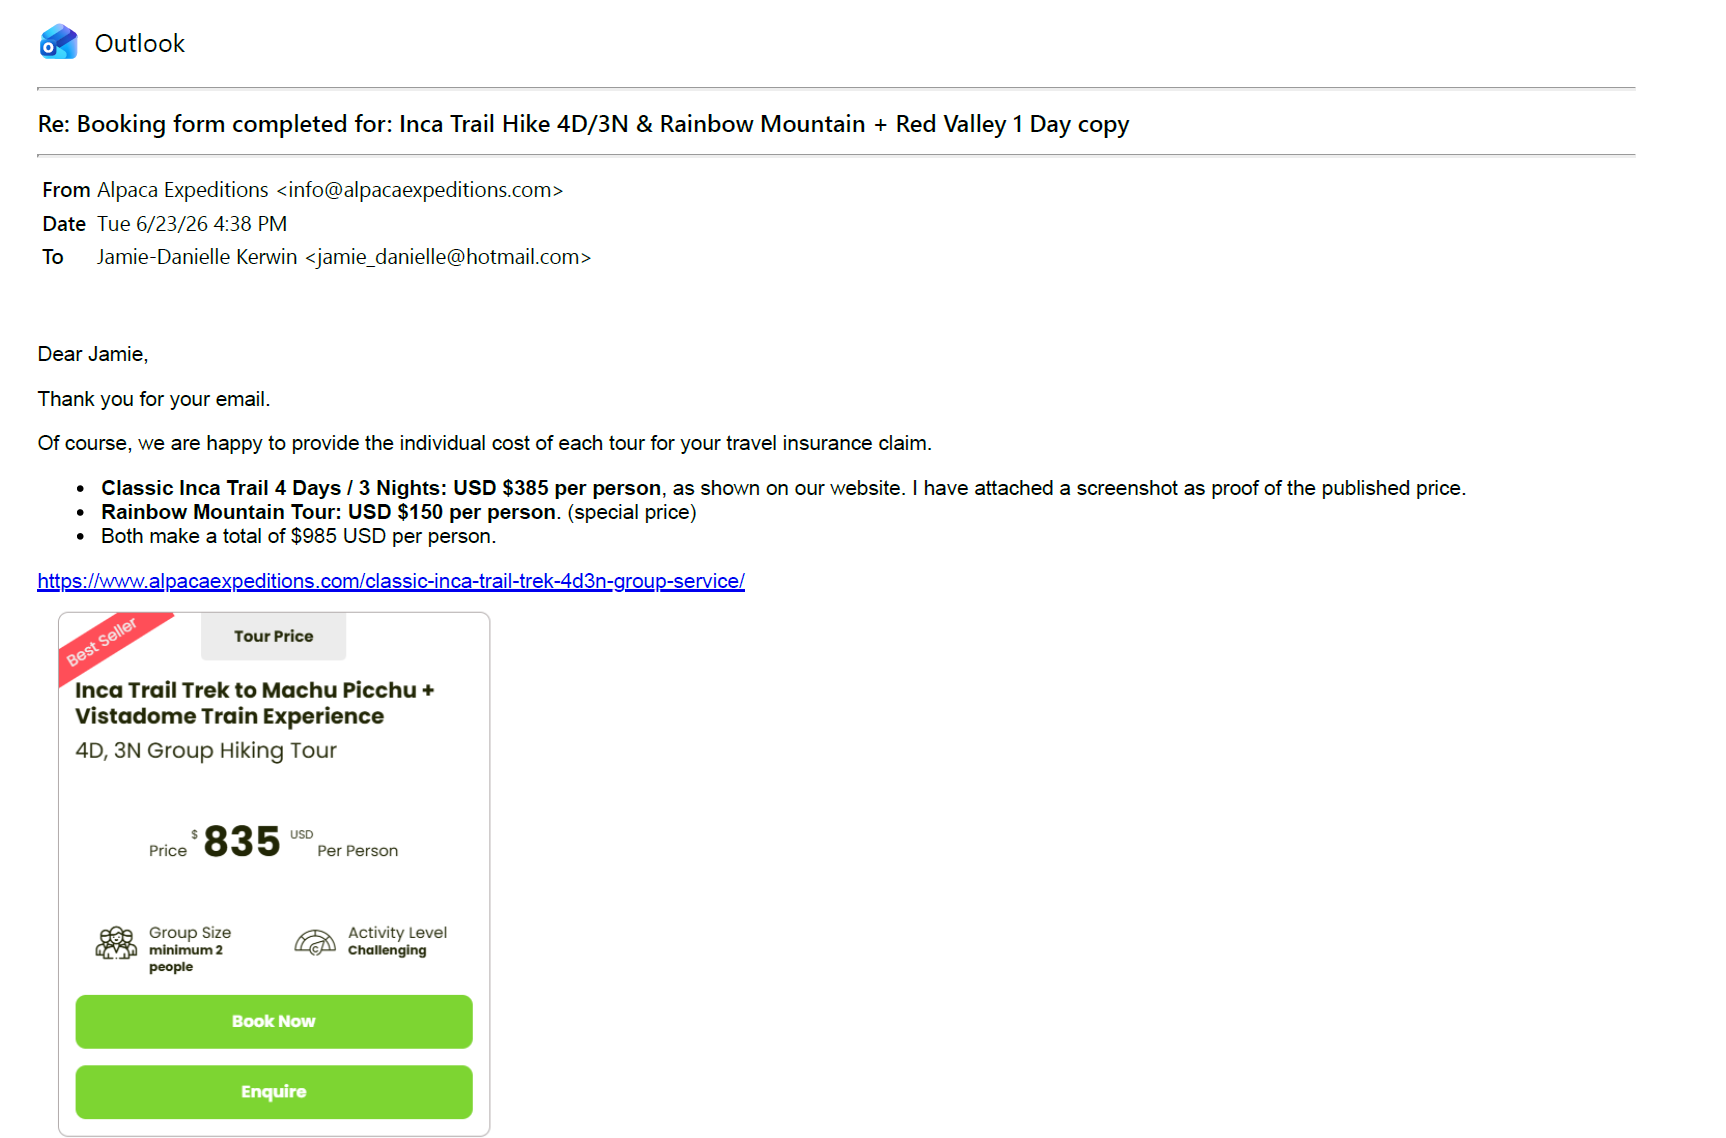
No proper receipt for Rainbow Mountain? I emailed the tour company and asked them to confirm exactly what we had paid. This became part of the proof for our insurance claims.
5. Organize Everything Before You Submit
Apparently keeping every receipt, email and piece of paperwork wasn't organized enough for me.
I made a spreadsheet too.
For my Peru claim, I listed each expense, how much I had paid and what it was for. Then I matched it with the corresponding receipt, statement or supporting document.
You absolutely do not need to become as organized as I am.
But remember that someone who wasn't on your trip is going to review your claim.
They don't know why you took that Uber. They don't know why you paid extra for a different airline seat. They don't know why a tour was cancelled or why one hospital sent you to another for an MRI.
Your documentation needs to tell that story for you.
For unusual expenses, include whatever explains why they were necessary. My medical paperwork, for example, documented that my knee couldn't properly bend and I needed additional space on the flight home. That connected the airline upgrade to my injury rather than making it look like I had simply decided to treat myself to a nicer seat.
My system was basically:
Expense → proof of purchase → proof of payment → supporting documentation, if needed.
You don't need a colour-coded filing system or a spreadsheet.
Although I fully support both.
The point is to make your claim clear enough that someone else can easily understand it.
Don't make the insurance company play detective.
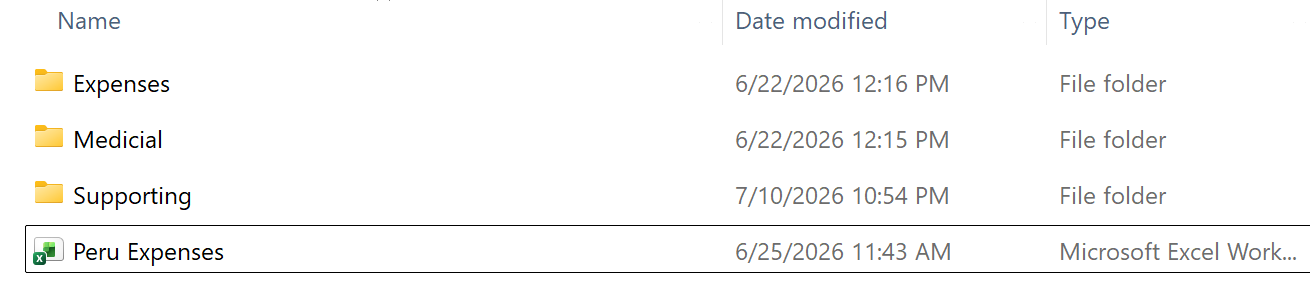
Apparently a spreadsheet wasn’t enough. I also separated everything into Expenses, Medical and Supporting folders so every document for my claim was easy to find.
6. Read the Fine Print Before You Travel
Buying travel insurance isn't enough.
You also need to know what you actually bought.
This became very real for me in Peru because we were hiking the Inca Trail at high altitude. Travel insurance policies can have restrictions around certain activities, elevations and adventure sports, and I remember looking at the options before the trip and wondering whether I needed additional coverage for the hiking we had planned.
Then, after I injured my knee, I had that horrible little thought:
Wait...is this actually covered?
Thankfully, my claim was approved, but it made me pay much more attention to activity restrictions.
Don't just see the word hiking in your policy and assume that means every hike on the planet. Depending on your policy, there may be different rules for altitude, trekking, skiing, scuba diving, motorbikes or other activities you plan to do.
If you're not sure whether something is covered, ask rather than guessing.
The same applies to the type of insurance you buy. Travel insurance can potentially include trip cancellation or interruption, baggage and other travel-related problems, depending on the policy.
The point isn't that everyone needs the most expensive option. It's that your coverage should match the trip you're actually taking.
A week lying on a beach and a multi-day trek through the Andes aren't exactly the same vacation.
Your travel insurance shouldn't be one-size-fits-all either.

Not exactly exciting holiday reading, but this is the stuff that matters. I now pay much more attention to the actual policy wording—especially when a trip involves hiking, altitude or other activities.
7. Be Prepared to Pay Upfront
There was a lot I liked about how World Nomads handled my Peru claim.
They responded when I contacted them, recommended a hospital, sent me the paperwork I needed and checked in while I was still in Peru. Once I was home, they followed up again, and my claim was processed relatively quickly.
But there was one thing I didn't love.
I had to pay for everything upfront.
My MRI alone was around $450 USD. Then there were the other medical expenses, transportation and the airline upgrade I needed because my knee wouldn't bend.
Eventually, I got almost $2,400 CAD back.
But I had to have access to that money first.
Thankfully, I had a credit card. But it made me think about what would happen if I couldn't afford to front those expenses.
Having a large amount of emergency medical coverage doesn't necessarily tell you how the bills will actually be paid when you're standing in a hospital in another country.
That's something I pay much more attention to now.
When comparing travel insurance, find out how emergency medical expenses are handled. Depending on the insurer, policy, hospital and situation, you may have to pay yourself and request reimbursement later, while other situations may allow the insurer to arrange or coordinate payment directly.
If you're unsure, ask before your trip:
If I end up in a hospital, am I expected to pay upfront?
And if the answer is yes, think about how you would actually do that.
After paying for an MRI in Peru before knowing whether I was getting that money back, it's definitely a question I think is worth asking.
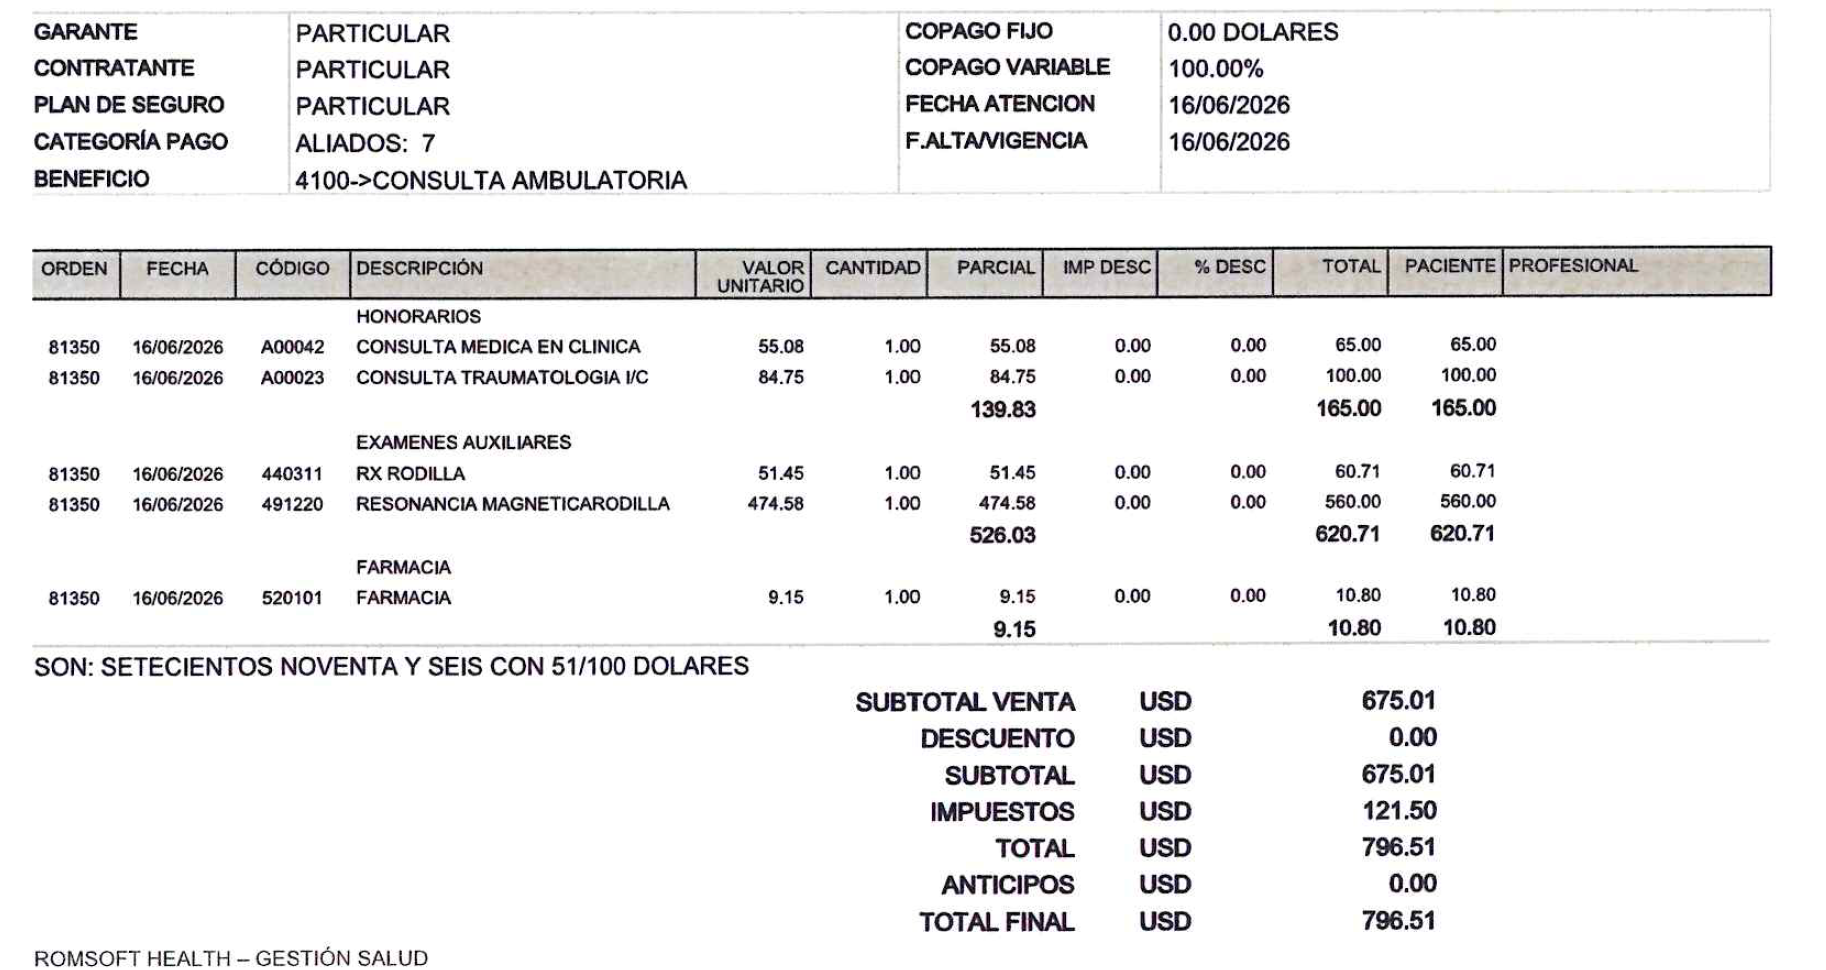
Having travel insurance didn’t mean I walked out without paying. This hospital bill was $796.51 USD, and I had to pay it upfront before claiming the money back later.
8. Before You Submit Your Claim
By the time you're ready to submit a travel insurance claim, you probably just want the whole thing over with.
I get it.
But before you hit submit, go through everything one last time.
Make sure you have:
Your completed claim forms
Receipts and invoices for the expenses you're claiming
Credit card or bank statements showing proof of payment, if required
Medical reports and doctor's notes for medical claims
Flight and hotel confirmations if they're relevant
Written cancellation confirmations for tours, hotels or other bookings
Airline documentation if your claim involves your flight or baggage
Photos of damaged luggage or belongings
Emails or correspondence that help explain what happened
Anything else your insurance company specifically requested
Then look at the claim from the perspective of someone who knows absolutely nothing about your trip.
Does it make sense?
Can they see what happened, why you incurred each expense, how much you paid and what documentation supports it?
If something looks confusing, explain it.
And before submitting anything, keep a copy of everything for yourself.
Hopefully, you buy travel insurance and never have to use it.
But I've now made claims for trip interruption, a lost phone and an injured knee, while also helping my travel companions with claims for missed activities and damaged luggage.
The biggest thing I've learned isn't some secret trick for getting a claim approved.
It's making sure you can prove what happened.
Contact your insurer early. Get documentation while you're still there. Keep your receipts, booking confirmations and proof of payment. Read your policy before doing something that might not be covered.
And if you're wondering whether you should keep a particular piece of paperwork?
Keep it.
Worst-case scenario, you get home with a folder full of receipts you never need.
I'd rather have that problem than be trying to convince an insurance company that I definitely paid cash for a tour up a mountain I never actually got to see.
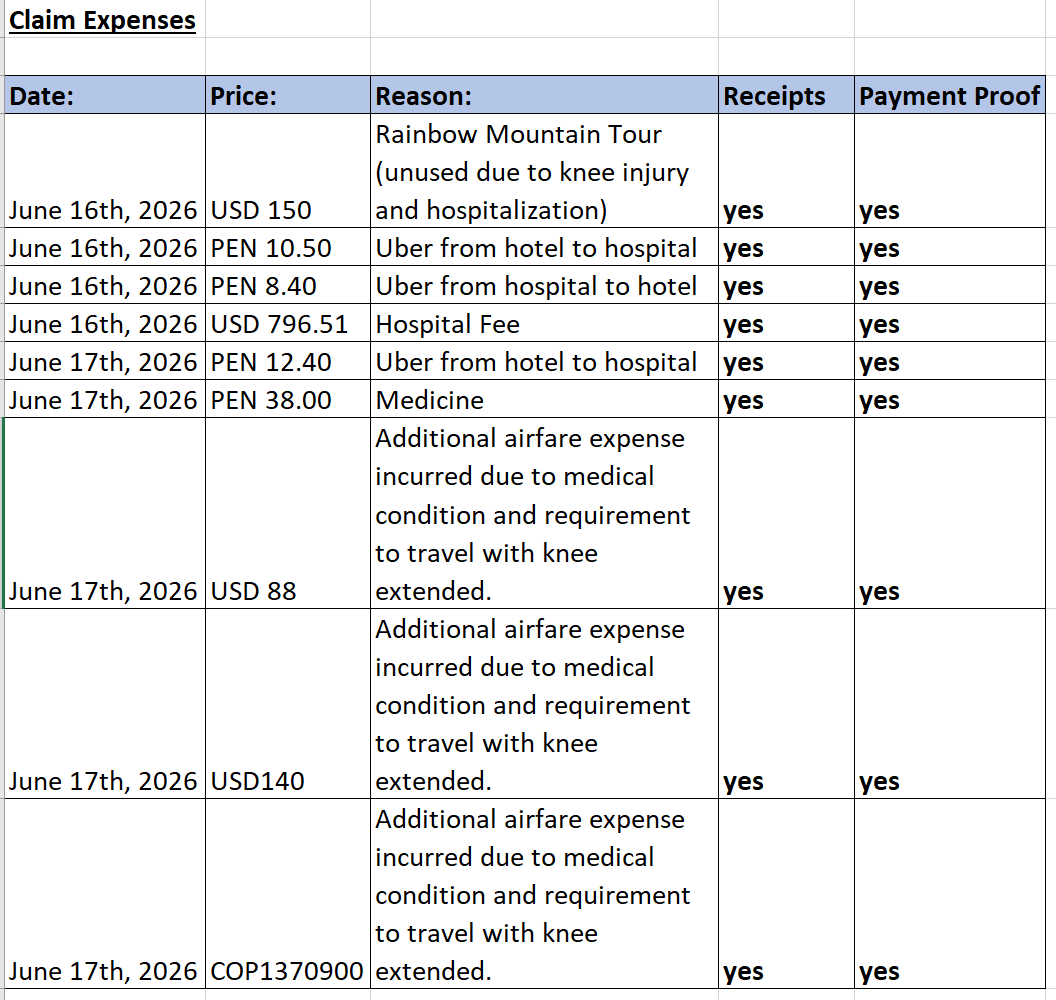
One last check before submitting my claim! Every expense listed, every receipt accounted for and proof of payment ready to go. Yes, I really am this organized. 😂
